kubeadm:https://kubernetes.io/zh-cn/docs/setup/production-environment/tools/kubeadm/install-kubeadm/
kubeadm部署前规划
节点组件规划
| 名称 |
宿主机IP |
节点服务 |
| master |
172.16.32.144 |
API Server,controlle,scheduler,kube-proxy,kubelet,etcd |
| node1 |
172.16.32.145 |
Dokcer kubelet kube-proxy |
| node2 |
172.16.32.146 |
Dokcer kubelet kube-proxy |
IP规划
1
2
3
| Node IP 10.0.0.0
Cluster IP 10.1.0.0
POD IP 10.2.0.0
|
宿主机准备环境
所有节点配置host解析
1
2
3
4
5
| cat >> /etc/hosts << EOF
172.16.32.144 master
172.16.32.145 node1
172.16.32.146 node2
EOF
|
所有节点关闭防火墙
1
2
| systemctl stop firewalld NetworkManager
systemctl disable firewalld NetworkManager
|
所有节点关闭SELinux
1
2
3
| setenforce 0
sed -i 's#SELINUX=disabled#SELINUX=disabled#g' /etc/selinux/config
getenforce
|
所有节点更新清华源
1
2
3
4
5
6
7
8
9
10
11
12
13
14
15
16
17
18
19
20
21
22
23
24
25
26
27
28
29
30
31
32
33
34
35
36
37
38
39
40
41
42
| cat > /etc/yum.repos.d/CentOS-Base.repo << 'EOF'
[base]
name=CentOS-$releasever - Base - mirrors.aliyun.com
failovermethod=priority
baseurl=http://mirrors.tuna.tsinghua.edu.cn/centos/$releasever/os/$basearch/
gpgcheck=0
gpgkey=http://mirrors.tuna.tsinghua.edu.cn/centos/RPM-GPG-KEY-CentOS-7
[updates]
name=CentOS-$releasever - Updates - mirrors.aliyun.com
failovermethod=priority
baseurl=http://mirrors.tuna.tsinghua.edu.cn/centos/$releasever/updates/$basearch/
gpgcheck=0
gpgkey=http://mirrors.tuna.tsinghua.edu.cn/centos/RPM-GPG-KEY-CentOS-7
[extras]
name=CentOS-$releasever - Extras - mirrors.aliyun.com
failovermethod=priority
baseurl=http://mirrors.tuna.tsinghua.edu.cn/centos/$releasever/extras/$basearch/
gpgcheck=0
gpgkey=http://mirrors.tuna.tsinghua.edu.cn/centos/RPM-GPG-KEY-CentOS-7
[centosplus]
name=CentOS-$releasever - Plus - mirrors.aliyun.com
failovermethod=priority
baseurl=http://mirrors.tuna.tsinghua.edu.cn/centos/$releasever/centosplus/$basearch/
gpgcheck=0
enabled=0
gpgkey=http://mirrors.tuna.tsinghua.edu.cn/centos/RPM-GPG-KEY-CentOS-7
[contrib]
name=CentOS-$releasever - Contrib - mirrors.aliyun.com
failovermethod=priority
baseurl=http://mirrors.tuna.tsinghua.edu.cn/centos/$releasever/contrib/$basearch/
gpgcheck=0
enabled=0
gpgkey=http://mirrors.tuna.tsinghua.edu.cn/centos/RPM-GPG-KEY-CentOS-7
EOF
|
1
2
3
4
5
6
7
8
9
10
| cat > /etc/yum.repos.d/epel.repo << 'EOF'
[epel]
name=Extra Packages for Enterprise Linux 7 - $basearch
baseurl=https://mirrors.tuna.tsinghua.edu.cn/epel/7/$basearch
failovermethod=priority
enabled=1
gpgcheck=1
gpgkey=file:///etc/pki/rpm-gpg/RPM-GPG-KEY-EPEL-7
EOF
|
所有节点确保网络通畅
1
2
3
4
| ping -c 1 www.baidu.com
ping -c 1 master
ping -c 1 node1
ping -c 1 node2
|
所有节点配置时间同步
1
2
3
4
| yum install chrony -y
systemctl start chronyd
systemctl enable chronyd
date
|
所有节点关闭SWAP分区
1
2
3
| swapoff -a
sed -i '/swap/d' /etc/fstab
free -h
|
kubeadm准备环境
所有节点设置k8s禁止使用swap
1
2
3
4
| cat > /etc/sysconfig/kubelet<<EOF
KUBELET_CGROUP_ARGS="--cgroup-driver=systemd"
KUBELET_EXTRA_ARGS="--fail-swap-on=false"
EOF
|
所有节点设置内核参数
1
2
3
4
5
6
| cat > /etc/sysctl.d/k8s.conf <<EOF
net.bridge.bridge-nf-call-ip6tables = 1
net.bridge.bridge-nf-call-iptables = 1
net.ipv4.ip_forward = 1
EOF
sysctl --system
|
所有节点加载IPVS模块
1
2
3
4
5
6
7
8
9
10
11
| cat >/etc/sysconfig/modules/ipvs.modules<<EOF
#!/bin/bash
modprobe -- ip_vs
modprobe -- ip_vs_rr
modprobe -- ip_vs_wrr
modprobe -- ip_vs_sh
modprobe -- nf_conntrack_ipv4
EOF
chmod +x /etc/sysconfig/modules/ipvs.modules
source /etc/sysconfig/modules/ipvs.modules
lsmod | grep -e ip_vs -e nf_conntrack_ipv
|
所有节点安装配置Docker
1
2
3
4
5
6
7
8
9
10
11
12
13
| wget https://download.docker.com/linux/centos/docker-ce.repo -O /etc/yum.repos.d/docker-ce.repo
sed -i 's#download.docker.com#mirrors.tuna.tsinghua.edu.cn/docker-ce#' /etc/yum.repos.d/docker-ce.repo
yum makecache fast
yum -y install docker-ce-20.10.15 docker-ce-cli-20.10.15
mkdir /etc/docker -p
cat > /etc/docker/daemon.json <<EOF
{
"exec-opts": ["native.cgroupdriver=systemd"]
}
EOF
systemctl enable docker && systemctl start docker
docker -v
|
所有节点设置kubeadm的国内yum仓库-清华源
1
2
3
4
5
6
7
| cat >/etc/yum.repos.d/kubernetes.repo<< 'EOF'
[kubernetes]
name=kubernetes
baseurl=https://mirrors.tuna.tsinghua.edu.cn/kubernetes/yum/repos/kubernetes-el7-$basearch
enabled=1
gpgcheck=0
EOF
|
所有节点安装kubeadm
1
| yum install -y kubelet-1.20.15 kubeadm-1.20.15 kubectl-1.20.15 ipvsadm --nogpgcheck
|
设置kubelet开机启动
1
| systemctl enable kubelet
|
kubeadm master节点配置
master节点初始化集群
1
2
3
4
5
6
7
8
9
| kubeadm init \
--apiserver-advertise-address=172.16.32.144 \
--image-repository registry.aliyuncs.com/google_containers \
--kubernetes-version v1.20.15 \
--service-cidr=10.1.0.0/16 \
--pod-network-cidr=10.2.0.0/16 \
--service-dns-domain=cluster.local \
--ignore-preflight-errors=Swap \
--ignore-preflight-errors=NumCPU
|

kubeadm初始化完成后,请保存一下最后两行node节点加入集群命令,后续用到
master节点执行配置命令
1
2
3
| mkdir -p $HOME/.kube
cp -i /etc/kubernetes/admin.conf $HOME/.kube/config
chown $(id -u):$(id -g) $HOME/.kube/config
|
master节点获取node节点信息

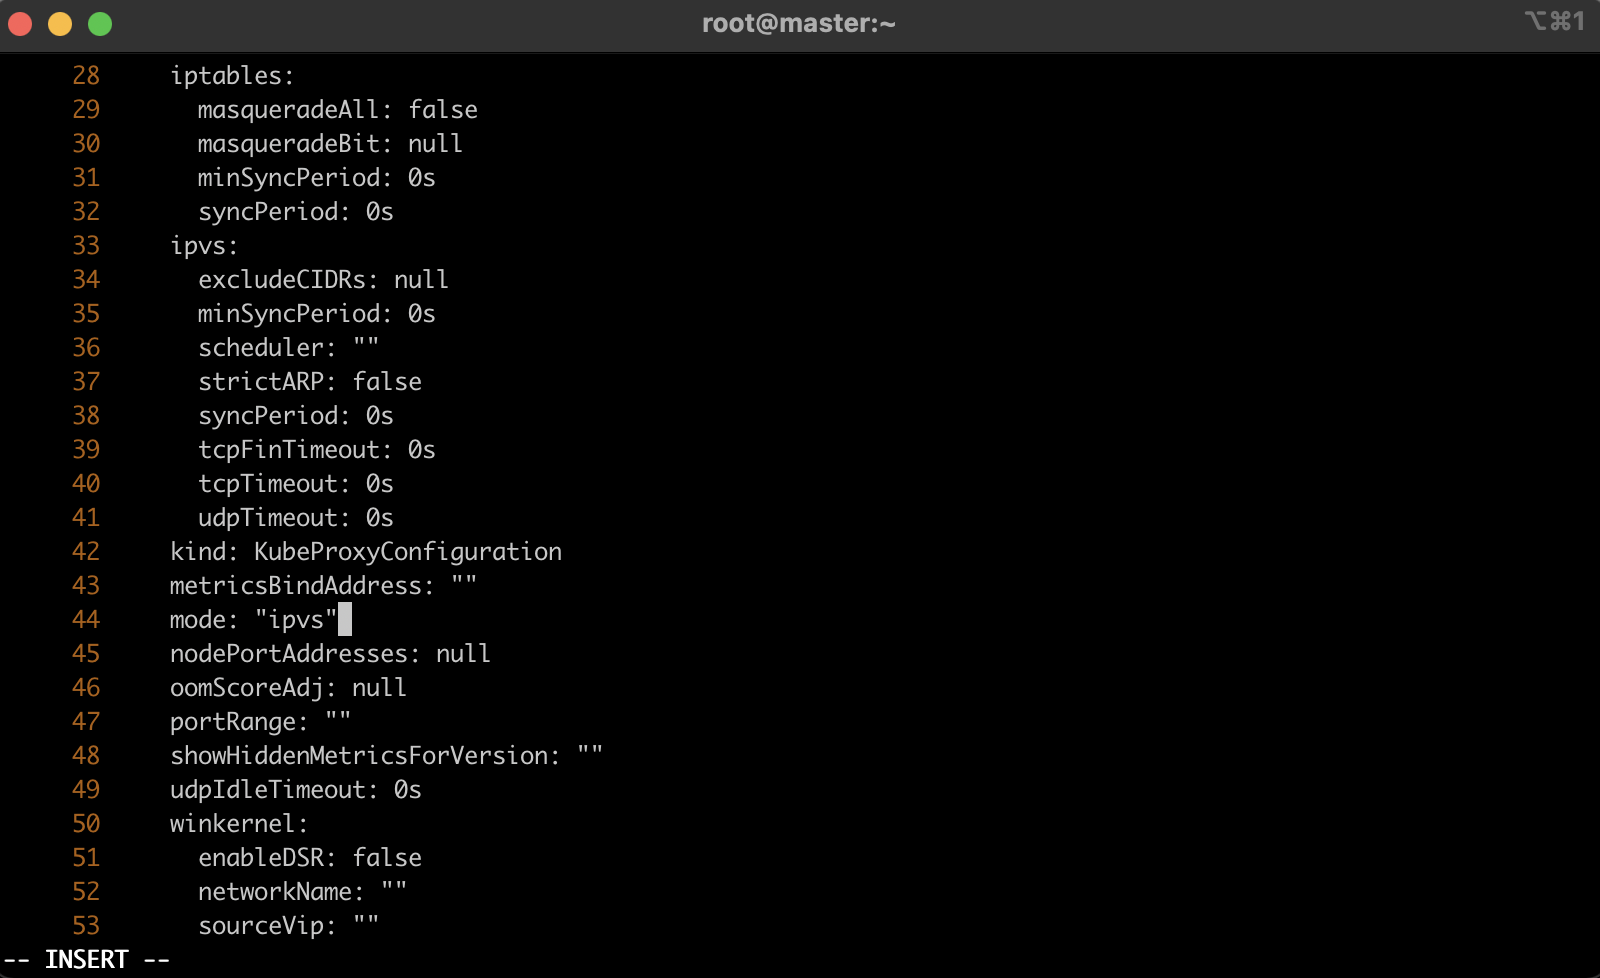
master节点设置kube-proxy使用ipvs模式
1
| kubectl edit cm kube-proxy -n kube-system
|
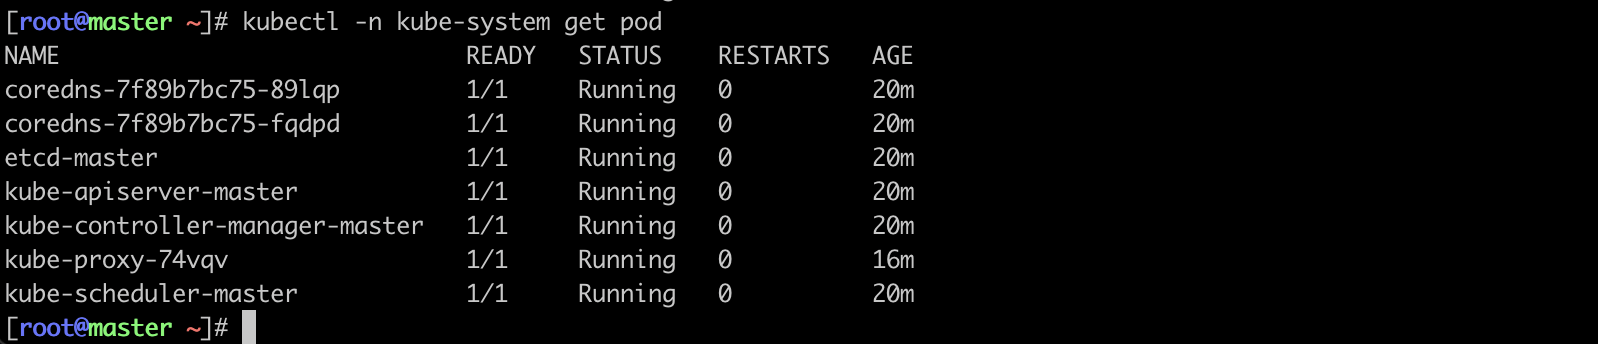
1
2
| kubectl -n kube-system get pod|grep kube-proxy|awk '{print "kubectl -n kube-system delete pod "$1}'|bash
ipvsadm -Ln
|
此处是删除原来kube-proxy,生成新的kube-proxy,执行命令显示下面一样即可

master节点部署Flannel网络插件
Flannel:https://github.com/flannel-io/flannel/blob/master/Documentation/kube-flannel.yml
1
2
3
4
5
6
7
8
9
10
11
12
13
14
15
16
17
18
19
20
21
22
23
24
25
26
27
28
29
30
31
32
33
34
35
36
37
38
39
40
41
42
43
44
45
46
47
48
49
50
51
52
53
54
55
56
57
58
59
60
61
62
63
64
65
66
67
68
69
70
71
72
73
74
75
76
77
78
79
80
81
82
83
84
85
86
87
88
89
90
91
92
93
94
95
96
97
98
99
100
101
102
103
104
105
106
107
108
109
110
111
112
113
114
115
116
117
118
119
120
121
122
123
124
125
126
127
128
129
130
131
132
133
134
135
136
137
138
139
140
141
142
143
144
145
146
147
148
149
150
151
152
153
154
155
156
157
158
159
160
161
162
163
164
165
166
167
168
169
170
171
172
173
174
175
176
177
178
179
180
181
182
183
184
185
186
187
188
189
190
191
192
193
194
195
196
197
198
199
200
201
202
203
204
205
| ---
kind: Namespace
apiVersion: v1
metadata:
name: kube-flannel
labels:
pod-security.kubernetes.io/enforce: privileged
---
kind: ClusterRole
apiVersion: rbac.authorization.k8s.io/v1
metadata:
name: flannel
rules:
- apiGroups:
- ""
resources:
- pods
verbs:
- get
- apiGroups:
- ""
resources:
- nodes
verbs:
- list
- watch
- apiGroups:
- ""
resources:
- nodes/status
verbs:
- patch
---
kind: ClusterRoleBinding
apiVersion: rbac.authorization.k8s.io/v1
metadata:
name: flannel
roleRef:
apiGroup: rbac.authorization.k8s.io
kind: ClusterRole
name: flannel
subjects:
- kind: ServiceAccount
name: flannel
namespace: kube-flannel
---
apiVersion: v1
kind: ServiceAccount
metadata:
name: flannel
namespace: kube-flannel
---
kind: ConfigMap
apiVersion: v1
metadata:
name: kube-flannel-cfg
namespace: kube-flannel
labels:
tier: node
app: flannel
data:
cni-conf.json: |
{
"name": "cbr0",
"cniVersion": "0.3.1",
"plugins": [
{
"type": "flannel",
"delegate": {
"hairpinMode": true,
"isDefaultGateway": true
}
},
{
"type": "portmap",
"capabilities": {
"portMappings": true
}
}
]
}
net-conf.json: |
{
"Network": "10.2.0.0/16",
"Backend": {
"Type": "vxlan"
}
}
---
apiVersion: apps/v1
kind: DaemonSet
metadata:
name: kube-flannel-ds
namespace: kube-flannel
labels:
tier: node
app: flannel
spec:
selector:
matchLabels:
app: flannel
template:
metadata:
labels:
tier: node
app: flannel
spec:
affinity:
nodeAffinity:
requiredDuringSchedulingIgnoredDuringExecution:
nodeSelectorTerms:
- matchExpressions:
- key: kubernetes.io/os
operator: In
values:
- linux
hostNetwork: true
priorityClassName: system-node-critical
tolerations:
- operator: Exists
effect: NoSchedule
serviceAccountName: flannel
initContainers:
- name: install-cni-plugin
image: docker.io/rancher/mirrored-flannelcni-flannel-cni-plugin:v1.1.0
command:
- cp
args:
- -f
- /flannel
- /opt/cni/bin/flannel
volumeMounts:
- name: cni-plugin
mountPath: /opt/cni/bin
- name: install-cni
image: docker.io/rancher/mirrored-flannelcni-flannel:v0.19.2
command:
- cp
args:
- -f
- /etc/kube-flannel/cni-conf.json
- /etc/cni/net.d/10-flannel.conflist
volumeMounts:
- name: cni
mountPath: /etc/cni/net.d
- name: flannel-cfg
mountPath: /etc/kube-flannel/
containers:
- name: kube-flannel
image: docker.io/rancher/mirrored-flannelcni-flannel:v0.19.2
command:
- /opt/bin/flanneld
args:
- --ip-masq
- --kube-subnet-mgr
- --iface=ens33
resources:
requests:
cpu: "100m"
memory: "50Mi"
limits:
cpu: "100m"
memory: "50Mi"
securityContext:
privileged: false
capabilities:
add: ["NET_ADMIN", "NET_RAW"]
env:
- name: POD_NAME
valueFrom:
fieldRef:
fieldPath: metadata.name
- name: POD_NAMESPACE
valueFrom:
fieldRef:
fieldPath: metadata.namespace
- name: EVENT_QUEUE_DEPTH
value: "5000"
volumeMounts:
- name: run
mountPath: /run/flannel
- name: flannel-cfg
mountPath: /etc/kube-flannel/
- name: xtables-lock
mountPath: /run/xtables.lock
volumes:
- name: run
hostPath:
path: /run/flannel
- name: cni-plugin
hostPath:
path: /opt/cni/bin
- name: cni
hostPath:
path: /etc/cni/net.d
- name: flannel-cfg
configMap:
name: kube-flannel-cfg
- name: xtables-lock
hostPath:
path: /run/xtables.lock
type: FileOrCreate
|
在84行修改Networkip,规划时是10.2.0.0/16 。 在159行增加网卡类型“- —iface=ens33”,自行查看宿主机时eth0还是ens33
1
2
3
| kubectl apply -f kube-flannel.yml
kubectl -n kube-system get pod
kubectl -n kube-system get nodes
|
flannel apply后需要等待,所有pod都Running即可
kubeadm node节点配置
node节点加入集群
1
2
| kubeadm join 172.16.32.144:6443 --token 55vl92.0h5vgdupwcnyl4dj \
--discovery-token-ca-cert-hash sha256:f30947828a174c35ad12fcc2b635b4f9d5bb7c6bc1ef5c44ccb0ced5430d607e
|
master节点执行打标签命令
1
2
| kubectl label nodes node1 node-role.kubernetes.io/node=
kubectl label nodes node2 node-role.kubernetes.io/node=
|
检查状态

kubectl支持命令补全
1
2
3
4
| yum install bash-completion -y
source /usr/share/bash-completion/bash_completion
source <(kubectl completion bash)
kubectl completion bash > /etc/bash_completion.d/kubectl
|

